 |  |
| February 18, 2009 to Infinity and Beyond! ~ My PSP Work Page 2 |
|
I joined the JNCS-TutsNSuch Group So far, Cyndi, Mary, Marie, Judy, Kat, Lil and Krys...have helped me. :) |
| |
 |
|
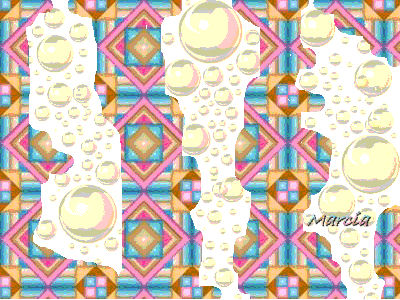
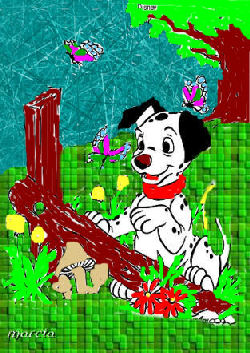
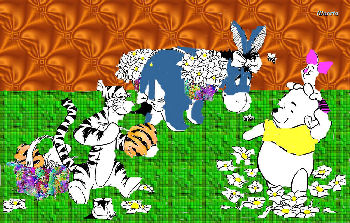
I painted and pattern this picture. |
 |
|
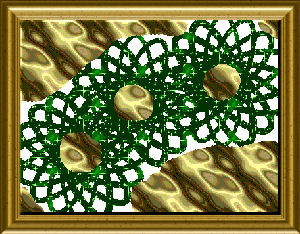
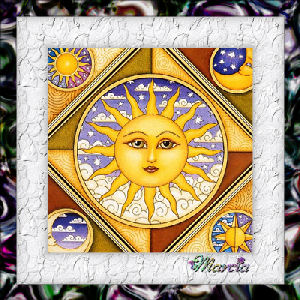
I used pattern and tube tool for this. Then I used text, Drop Shadow in 3d effects and selection none. |
 |
|
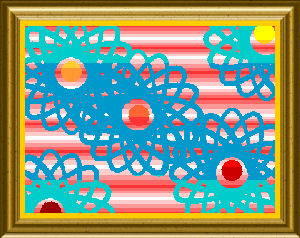
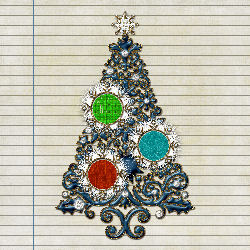
I used patterns and different tools in paintbrush for this piece. Then I embedded it. Then I framed it and resized it. |
|
Saving Fonts To Windows Font Folder on Desktop Cut font first Go to My Computer Go to C Drive Go to Windows Folder Go to Fonts Folder Paste in fonts folder This works for me! |
|
Opening Supplies in PSP Make a folder of : Frames ~ Masks ~ Gradients ~ Textures ~ Tubes ~ Backgrounds ~ Glitter ~ etc. go to the top of PSP, hit FILE.......PREFERENCES.........FILE LOCATIONS....... the a box pops up, highlight MASKS, then on the right side, hit ADD........ look for where you put them in my pictures, then they will show up Works for me. and to USE your masks you would need to go to LAYERS, Load/Save masks, load mask from disk, then a box pops up and on the left you click and search for the mask you want to use Works for me. |
|
Opening Tubes I gotta tell you (this is what was told to ME,cyndi, when i first did psp) make a folder somewhere you can find it easily, mine is called TUBES, then when you open PSP, go to FILE, OPEN to find your tubes, then click and bring it into psp |
|
Opening a tube 2 while in psp ....up at the top ,on the left is "file" click that. When you click "open" it should open up in psp then you will see all those folders. Scroll over to picture tubes , double click and the folder will open And when you click on a tube you will be shown what it looks like. |
|
Getting a gradient to work. Open a NEW IMAGE (File, NEW) doesnt matter how big Then go to flood PAINT BUCKET on the left side toolbar. Look at the materials palette(upper right side), then click on the top box, it will open, there will already be gradients in there that Jasc put there. Pick one, then click on the new image and flood it with the gradient. This Works For Me. |
|
Loading Supplies 2 I,Kat, suggested putting extra masks, gradients, patterns and textures, etc into the My Psp Files folders. But you are having trouble accessing the ones that are already in you PSP Program? They should come up automatically when you go to gradients in the materials box, or the mask dialogue box when you go to load a mask. Works for me. Click in one of the color boxes, either foreground or background, and a box will open up. On the top you will see 3 tabs. Color, Gradient, and Pattern. That is how you select a gradient or a pattern. Works for me. If you are in PSP9, you can find the Tube tool next to or below the eraser tool depending on where your toolbar is. Click on the tube tool, and a little box with a picture pops up near the top. It has a drop down menu, and you select whatever tube you want to use that way. Works for me. |
|
Supplies/Tools and Plugins You'll see a picture of the tube tool, called presets, then the little picture box with a drop down button, then to the right there are boxes for scale, step, placement, and selection modes. Should be 3rd row from the top Works for me. It's the box next to presets that has it's own drop down. That is where you will find all your tubes Works for me And I,Kat, would just load the plugins, by unzipping the zips for the filters, taking the folders with the plugin you get from the zip, and put it in plug ins in your psp program. Then go to File/Preferences/files locations and tell the computer to look for that plugin in that folder. |
|
If you don't like what you did on psp... there is always EDIT and UNDO if you dont like something you've done |
|
Gradients They "Gradients", dont need to be jpg or gifs hon, if you make a path in your psp (file, preferences) then you go to the materials palette and click one of those color squares, a box pops up that says COLOR, GRADIENT, PATTERN... choose gradient and it shows up then, then ya wanna go to your paint bucket to flood fill your image Works for me. |
|
Easy Tuturials : http://heartcrygraphics.com/PaintShopPro/Lady_Bug.html : Lady Bug http://heartcrygraphics.com/PaintShopPro/american.html : American http://www.jansdesigns.com/tutorials/leatherframe.html : LeatherFrame *** http://www.jansdesigns.com/tutorials/egg.html http://www.jansdesigns.com/tutorials/dolphinplate.html : Eyecandy 4000 http://www.jansdesigns.com/tutorials/bug.html http://www.jansdesigns.com/tutorials/gaussianblur_frame.html http://www.psp-tutorials.nl/taglessen/tchounette/chatonstendresse.html Kittens on pink http://designsbycs.co.uk/honesty.htm Easy according to Cyndi http://designsbycs.co.uk/Beth.htm Easy according to Cyndi https://www.angelfire.com/stars4/eveningstar/T/Angellovetut.html Easy according to Cyndi http://www.designsbyjoy.net/DesignerTag/hoop.htm Cross Stitch Hoop Tut EASY according to Cyndi http://designsbycs.co.uk/flickeringcandles.htm "Animation and EASY" according to Cyndi http://designsbycs.co.uk/roseblock.htm "EASY" according to Cyndi and it is a Rose! Hard Tutorials : http://insatiabledreams.net/Gold.html http://thrusugarseyes.com/tutorials/tiedyefairy/tiedyefairy.htm http://www.debstuts.com/v8/Pg_1/leatherframe.html http://www.sassysignatures.com/msgtext.htm Animation http://graphicsbysue.net/updates3/112/snowyfarm.htm Animation http://www.nathy.net/psp/tutorials/goldendove.html http://www.insatiabledreams.net/Dayz_for_rain.html Animation http://sweetsstuff.com/friendship.html ~~ ~~"You have to purchase supplies" "Judy says fun tut to play with" |
|
What you need to Know: http://www.dizteq.com/joestuff/filter.html a plugin tutorial ! What You Need To Have: To use filters with Paint Shop Pro you will need some additional software. Most filters come in sets and are zipped together for smaller downloads. You will need WinZip or some other program for unzipping these files. You can get them at most shareware sites . Recently there is another method of making these downloadable files even smaller. One of the largest of all filter sites Filter Factory Gallery with largest collection of free filters is now compacting sets of filters into library files with FFL extensions before zipping them up for download. Once you have downloaded these filters you will need to extract them from the zip file and then use Plugin Commander to convert them to individual filter files (8BF). The Lite version of PICO as it is known is free. Another method is to purchase Filters Unlimited. This is a filter as well. However it will put your Filter Factory type filters in to very small compact databases structure that will save much in resources. This in my opinion is a must have. When you download this program read the site carefully as there are additional system files and other information you may need to use it. http://thepluginsite.com/ a very good site for plugins "Free" and Frames. Last but not least you will need MSVCRT10.DLL to use all plugin filters. You can download it from my Free Stuff page. Most Filter Factory filters that are 56KB will work fine with just this DLL file. Most other filters that are not 56KB in size will either need Filters Unlimited of PLUGIN.DLL which only comes with Adobe products or need to be converted using PICO. Both PICO and Filters Unlimited will only convert Filter Factory plugins at this time however. These required DLL files should be copied to your \WINDOWS\SYSTEM folder. Commerical filters will have other methods and often require you to install them. http://www.dizteq.com/joestuff/freestuff.html To Download : MSVCRT.10.DILL for your filters to work |
|
Install it " MSVCRT.10.DILL " in your 'Windows' System 32 folder. When You Get This Installed, Your Plugins will work smoothly. It should look like this: My Computer ~ C Drive ~ Windows ~ system 32 folder C:\WINDOWS\system32 http://www.dizteq.com/joestuff/freestuff.html To Download : MSVCRT.10.DILL for your filters to work |
 |  |
 |
 |
 |
 |  |
 |
| I did with a brush |
| Tutorial on Coloring Pages in Psp by Emeralda |
| Basic Tutorials |
| Tuts for Incredimail Users |
|
Glitter Tuturials http://fifthhouse.net/pspglitterpic.htm http://fifthhouse.net/pspglittertext.htm http://www.barbkermisdesigns.com/TutGlitters.htm http://www.pspug.org/tutorial/html/tut7eff/fontglitter_v7.htm http://graphicssoft.about.com/od/paintshoppro/ss/akglitterhearts_5.htm http://tutorials.jewelswebgraphics.com/glittername.html http://www.glitter-faerie.net/pages/tutorial1.php http://ca.msnusers.com/PlayingwithPSP/yourwebpage36.msnw http://auburn_angel1.tripod.com/dollbodies/id11.html http://dancinglayouts.nuclearcentury.com/glittering-text-tutorial/ http://www.bemymind.com/glittermore1.html https://www.angelfire.com/la3/juanita2/glitterpicture.html |
|
Autosave When PSP crashes or freezes for some reason and you haven't saved your work, you can lose everything, Go to File > Preferences > Autosave settings. This will open the Autosave Settings dialogue box, Tick the 'Enable Autosave' box. Set the time schedule you require, 5 minutes should be sufficient. Click OK. Autosave is now enabled and your work will automatically be saved to the temp file every 5 minutes. If PSP crashes you can re-open and your work will be loaded as before. |
| Free Graphic Links |
|
NOTES: FTU and PTU means : Free To Use and Pay To Use. For more information and to stay up to date on Yahoo! Mail news, be sure to visit the Yahoo! Mail blog [http://ymailblog.com]. |
|
More Tutorials: Easy and Hard http://www.bunnysattic.pspmadeez.org/tutorials/homeontherange.html http://www.bunnysattic.pspmadeez.org/tutorials/scrappinpink.html http://www.bunnysattic.pspmadeez.org/tutorials/linemeuptag.html http://www.bunnysattic.pspmadeez.org/tutorials/maskedwarbirdtag.html http://www.debstuts.com/v9/Pg_2/ZZ_Frame.htm http://www.debstuts.com/v9/Pg_1/GoneDotty.htm http://www.debstuts.com/v9/Pg_2/Soul.htm http://www.cruzines.com/WindowPaneTut.htm "Looks Neat" http://amatpspdesigns.com/tutorial16/tutorial16ingles.htm http://amatpspdesigns.com/tutorial23/tutorial23ingles.htm http://www.designsbykoko.com/tish/kaleidoscopefairy.html http://www.insatiabledreams.net/Listen_to_your_heart.htm http://www.insatiabledreams.net/A_million_Tears.htm http://www.insatiabledreams.net/Be_Yourself.htm |
|
Easy Tutorials http://suzshook.topcities.com/tutorials/bigblinkie/ http://tutorials.jewelswebgraphics.com/jwgblinkies.html http://www.psp-tutorials.nl/taglessen/bastelhexe/safarilook.html http://www.psp-tutorials.nl/taglessen/bastelhexe/asiadreams.html http://www.psp-tutorials.nl/taglessen/bluefay/flowerwoman.html http://www.psp-tutorials.nl/taglessen/bluefay/magentavariation.html http://www.psp-tutorials.nl/taglessen/caminhos/shadows.html http://www.psp-tutorials.nl/taglessen/charlie/distance.html http://www.psp-tutorials.nl/taglessen/charlie/youshallbeloved.html http://www.psp-tutorials.nl/taglessen/colombe/fashionface.html ~~ ~~(there are shamrocks in this one) http://www.psp-tutorials.nl/taglessen/colombe/hypnotique.html http://www.psp-tutorials.nl/taglessen/colombe/star.html http://www.psp-tutorials.nl/taglessen/colombe/gothicromanticism.html http://www.psp-tutorials.nl/taglessen/fairymist/connivence.html http://www.psp-tutorials.nl/taglessen/fairymist/amourssecretes.html http://www.psp-tutorials.nl/taglessen/virginia/dream.html http://www.psp-tutorials.nl/taglessen/cora/escape.html http://www.psp-tutorials.nl/taglessen/cora/myheart.html http://www.psp-tutorials.nl/taglessen/cora/serenity.html |
 |
|
I downloaded what looked to me as a scrap called eastereggs. I didn't see the whole scrap in my filebox, when I extracted it that is. So I opened up an eggscript..looked like a tool wheel on paper image. It opened my psp and opened a new page and then opened boxes that I hit ok for about 4 boxes, then it opened a material box and I picked my pattern. Then "I opened text" and put my text in, then I dropped shadow and hit select none. and Wayla!!!!! |
|
Looking for the right font name? http://new.myfonts.com/WhatTheFont/ |
|
How do I reproduce the copyright © symbol? When typing in any application hold the ALT key down and type 0169 © |
|
When You download a plugin , you want to save it in My Computer ~Cdrive ~ ~My Programs ~ Jasc Software ~ PaintshopPro ~ Filters. Then on Desktop in Windows Explorer, open up the plugin ~ Doubleclick ~ put in a register number or code number ~ Then it should be downloaded in your psp9 . Then take the plugin out of the filter file and put it in plugins file. "That way, if your psp crashes, you won't loose your plugins. I hope! |
|
To Open Brushes : Save them under Marcias Brushes in My Documents. Then go to psp9 and file and open new image. Then go to file ~ Export ~ Create Brushes. Works for me |
|
Keeping In The Lines when coloring: I use my magic wand, click on area you want to color, and then use fill it in tool. by Wild Rose of TWF I can help a little bit take your magic wand and click the area you want to fill, click on selections/modify/expand then in the little box, make it around two or three pixels, this way the fill gets close to the lines then fill the area with the color you want also to get a bit fancy you can play with effects/3D/cut out this will give you the shadows in the area you filled, makes it stand out. I hope this helps, hugs,ama If you use PSP use the magic wand Click the area you want to color and go to your Fill and fill the area with the color of your choice.. It is easy once you learn how.. Keep on trying it does get easier. By LadyLilith |
 |  |
|
First Tutorial w/Kat's Help : April 9, Thursday, 2009 |
| Happy Easter Ducky Lesson |
|
Started at 4pm stopped at 5:16pm : 1hour and 16 minutes Make the forground #fbdd60 and the background #f3ab2f Top pannel is Background and bottom is foreground Now open up a new file, make it 450 pxels, by 450 pixels Now you want to flood fill the image with your dark color. Find the little paint can tool, and right click the new image. That should pour the color onto the background "Right Click" Effects/plugins/icnet/filters unlimited Square and pick Square Edge 11 Hit apply Now go to effects/texture effects/ blinds Width is 4,, opacity is 40, the right click in the color box, and you will see a whole bunch of choices. find your foreground, light gold color and pick that. Then just check the Light from left/top box and click ok Now go back to Blinds again, and leave everything the same, Except put a check in the Horizontal box and hit ok. What you see are very slight little yellow lines or "blinds" in the dark orange Then take off the horizontal and hit ok again The blinds turned into plaid Right. that'show it's supposed to be. A faint plaid Now take the flower I sent you, copy it, and paste it onto the plaid as a new layer. No you want to make the flower layer a little smaller. Go to image/resize. and make sure "Resize all layers is not checked" You want to resize it about 95 % Now, I'm having trouble. You want to resize it 95 %, so in the box that says pixels, change it to percent Then you make sure it doesn't say Resize All Layers and hit ok I understand now. Ok, go up to edit, it should let you repeat the resize. Click that Now you want to go up to effect, 3d effects/ drop shadow Drop Shadow is my friend ok, make your friend 1/1/100/2 and black and apply it Ok, now add that little chick in the upper left hand corner Arrange it so it looks good beside the rose and the stem, Then merge all visible, and it's time to do the text Go to Layers, Merge/ Merge all visable It makes one layer out of all the layers you had Set your text to Yolanda size 48, and type out a message Do the drop shadow then selections none Do you want to save that as a gif with the transparant background, or as a jpg with a white background? If Gif, Then go to file, export/ to gif optimizer Click of Existing image or layer tansparancy then hit ok It will take it to a folder and you decide where you want to save it , and with what name. THen you're done And if you want to resize it again, you check Resize All Layers |
 |
 |
|
With Kats and Cyndi's Help: April 25, 2009 |
| Spring Frog! |
|
1: Open up a New Image. 600Wx500H. Pixels Raster Color Depth 16 Transparent. Flood fill with White. Go to Layers and add New Raster Layer It should read 100% Raster2 Make your foreground Color #f8c400. Background Color #06a2dd. 2: Change your Foreground Solid Color to Gradient. "By: Going to Material Properties Pallete Gradients Choose a color Multi Blue" Choose Foreground/Background "GO To EDIT!!!!!!!!!!" See where it says Alphabetical order : Foreground-background Click It. Style is Radial (the 4th square). Angle 115 Repeats 3 Horizontal and Vertical both 50. Click OK Floodfill with this gradient. 3 Effects/Artistic/colored foil Blur 25 Detail 42 Color White Angle 44. 4. Image/Resize by 90 percent bi-cubic Resize all layers UNchecked 5. Layers/Load Save Mask Load Mask from Disk Choose rectangulare38 Source luminance Checked Fit to layer Checked Invert transparency Checked Hide all mask Checked Load Go to this layer in your layer palette Merge/Merge Group 6. Open up the LeapingFrog&Butterfly~SLH image Edit/Copy Edit/Paste as a new layer Move Tool 7. Open up the rgiallongo-colorswordart Edit/Copy Edit/Paste as a new layer Movetool 8. Merge All Flattin 9. Add Text : Made By Marcia Effects 3D Effects Drop Shadow Selections None 10. Save as Jpg Resize if you want. |
 |  |
| Go To My Psp Work Page 1 | Go To My Psp Work Page 3 |
| Credits Also Goes To: |
| PSP 9.0 |
| JNCS-TutsNSuch Group | La Manouche |
| All That Stuff! | Dragon's Breath | Web Tech U Class |
 |
 |
| Aye, The Real Me |
| "This site is Created & Maintained by Marcia" |
| All material is ® and © by their respected owners. All rights reserved Disney. Use of copyrighted and trademarked material is for entertainment purposes only; no infringement on the original copyrights or trademarks held by the respected owners is intended or should be inferred |
| All material is ® and © by their respected owners. All rights reserved by the respected owners. Use of copyrighted. And trademarked material is for entertainment purposes only; no infringement on the original copyrights or trademarks held by the respected owners is intended or should be inferred. |